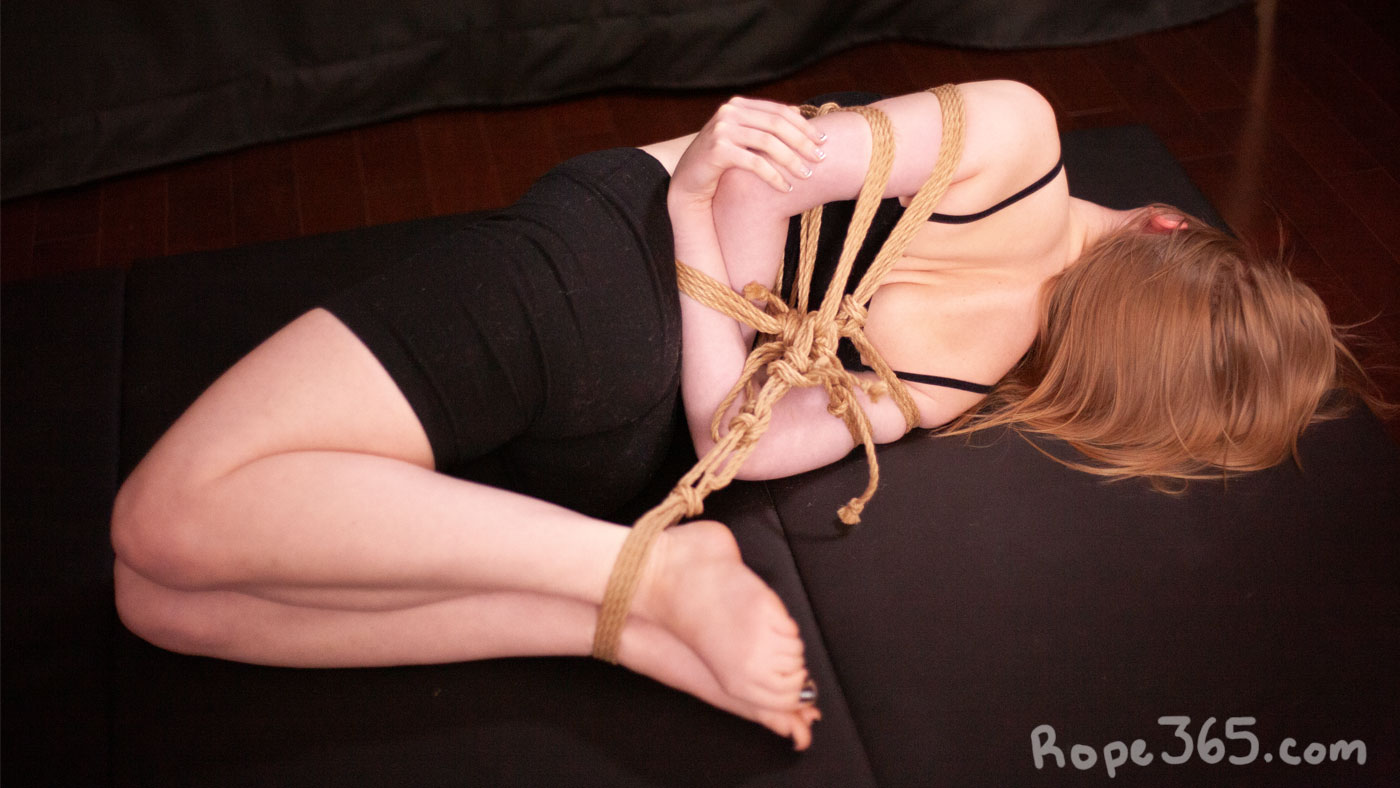
Bondage restriction usually starts with the arms, the part of the body capable of the widest range of movement and precision. Each part carries its little secrets. Mobility varies from person to person, and it will change over time. Exploring how the body can move helps us build our knowledge of mobility to move the arms efficiently and lock them in place with intent.
Upper Body Mobility
Upper Limb Joints Mechanics and Safety
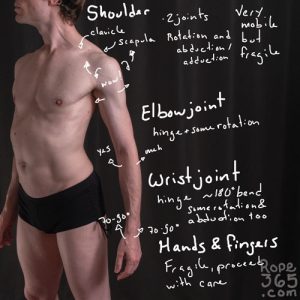
Understanding the mechanics of the shoulders, elbows, wrists and fingers is key for safe and efficient movement when doing rope. The upper limb is the most mobile part of the body, capable of strong lift and precise movement. Each joint has strengths and weaknesses that can be leveraged when moving and positioning the body to be tied.
Moving the shoulder requires the combination of several joints. It is one of the most complex articulations of the body. It combines the humerus (upper arm), clavicle, scapula, sternum and ribs to allow the arms to rotate, abduct (lift on the side) and adduct (pull downward). It is interesting that different groups of bones and muscles are involved for each type of movement, so the mobility is likely to be different when rotating and abducting. The main shoulder joint is a ball-and-socket type, and it is built quite strongly with large muscles protecting it when lifting things from the ground and generally being pulled downward. It’s the opposite when being pulled upward, as smaller muscles are involved, and injuries are much more common.
The elbow combines the humerus, the radius and the ulna. The joint between the humerus and the ulna is a hinge-type joint that allows for flexion and extension. Flexing involves strong muscles, and the joint has limited mobility in extension. The humerus and the radius form a ball-and-socket joint. The radius and the ulna work together to do the supination and pronation of the hand, which is the ability to have your palm facing front or back without moving the rest.
The ulna, the radius and the carpal bones form the joints at the wrist. It can move in several directions: flexion, extension, radial abduction, and ulnar adduction, but always at limited angles. This range of motion will be higher for people with hypermobility. We can exploit the limited range of the wrist and elbow to create restriction with a joint lock. The wrist is prone to many injuries such as muscle sprain, carpal tunnel syndrome, arthritis, etc.
These conditions will generally extend to the rest of the hand. We can find the carpal and the metacarpal bones in the palm of the hand, and the fingers have three phalanges except for the thumb, which has two. This is the average, but there are some variations in the hand configuration due to congenital disorders or amputation. The huge amount of bone, muscles and tendons in the hand allows for precise movement. Phalanges are hinge joints with much more strength and range of motion when flexing than when extending. The muscles between the metacarpal bones also allow some limited abduction and adduction (side to side).
This is just a brief summary to help understand the mechanics of movement. Medical resources can help you get a deeper understanding of each joint, which muscles, tendons, and bones are involved and how they move. In case of pain or injury, consult your physician.
Tying the Elbows Pointing Up
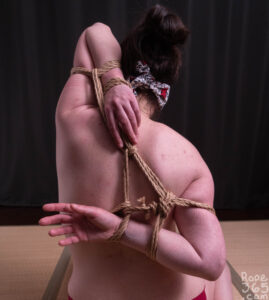
Ties like the bunny ears and the riffle tie will place an arm with the bent elbow pointing up. It can be quite challenging to hold this position vertically as gravity is pulling the arm down. When it starts to flail, the arm will often push against the rope, increasing the speed at which we will experience nerve and circulation issues. One strategy to reduce this is to get the arm as close as possible to the head so that it aligns vertically with the shoulder, reducing the impact of gravity.
Each person’s flexibility is different; some hyper-flexible people will be able to get their arm fully vertical, but most people can’t. For most people, the flexibility when rotating from the front will be higher than lifting from the side (abducting). It is also very likely that one side is more flexible than the other. Knowing which position is best for you can make a big difference in the sustainability of the tie.
Compare these different approaches:
- Extend the arm on the side, bend the elbow, point the elbow to the sky
- Extend the arm in front with the palm up, raise your hand to the sky, bend the elbow
Which method gets you closer to a vertical position? When the arm gets tired, lying on the ground is a great way to free yourself or your partner from the pull of gravity.
Tying the Arms in the Back
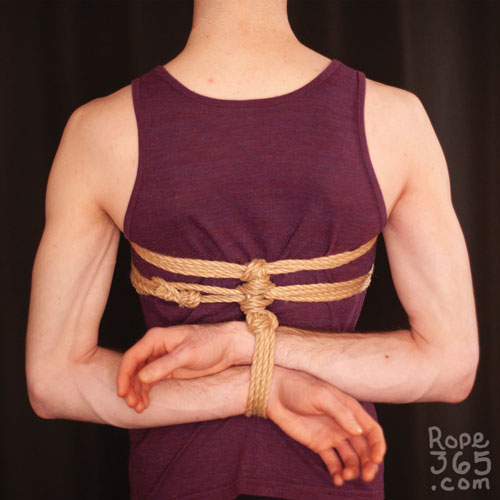
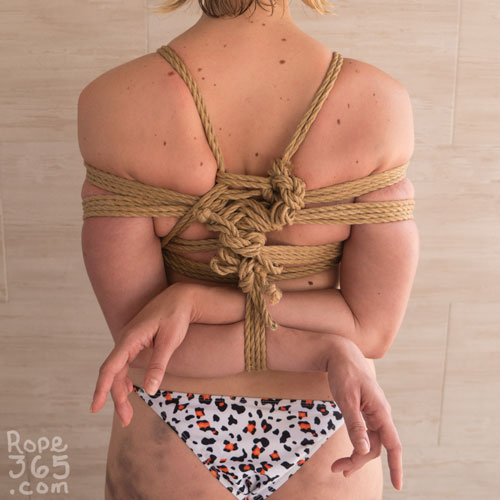
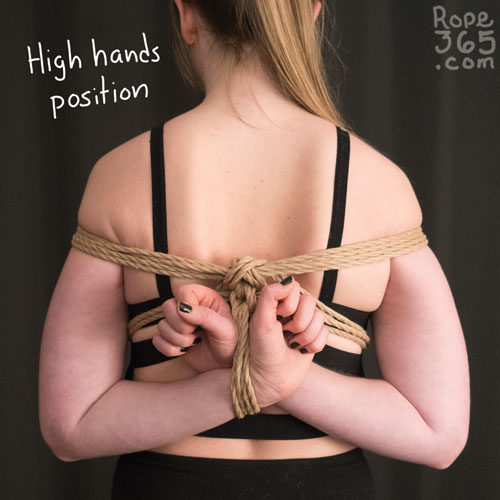
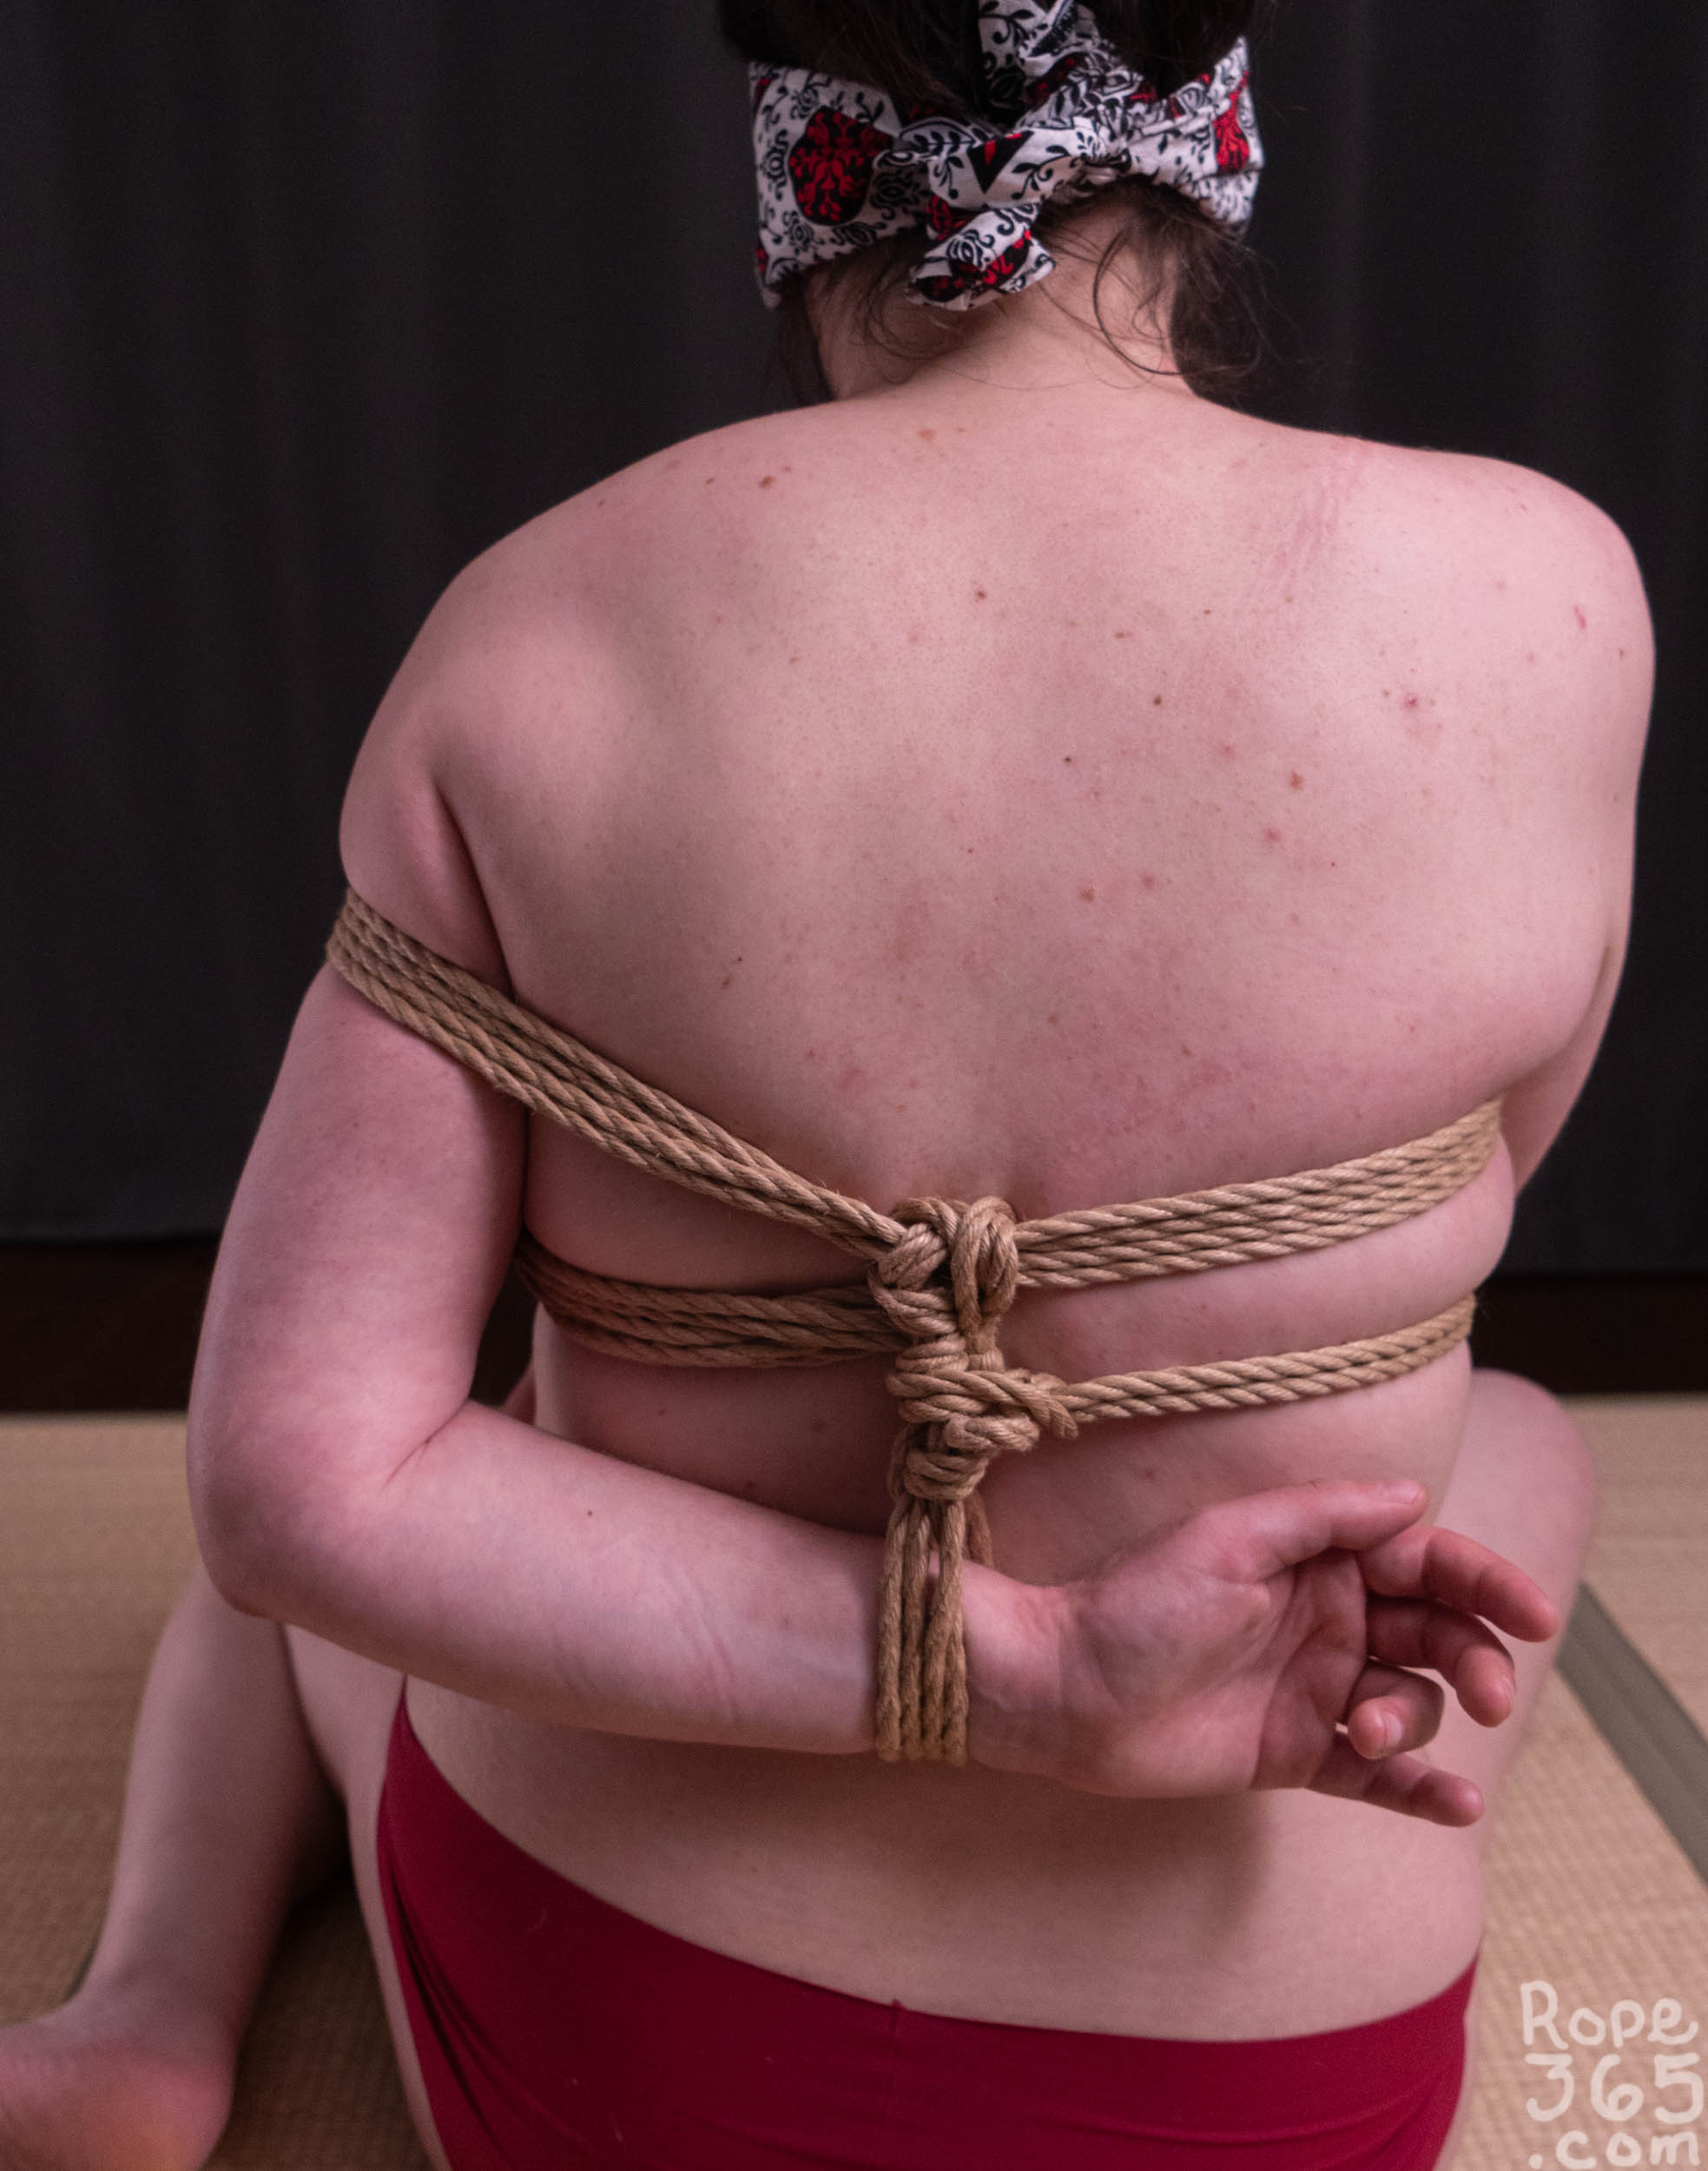
It is challenging for most people to maintain a position with their hands in the back. The main limitation is usually tension in the shoulders, which tend to get quite stiff in the modern lifestyle. Warming up and massaging can help get some mobility back. Regularly stretching the shoulders and improving your posture are also great long-term solutions to keep your body in good shape and prevent injuries.
There is a wide range of positions you can explore with the hands in the back; some are more accessible than others. Low wrists are the less stressful position on the body, and the higher we get the wrists, the more difficult it becomes. Bringing the palms together in prayer will also push the elbows out and may add stress at the wrist depending on the height. Using the rope to hold the wrists in position can really help relax in the tie.
To increase sustainability, we can place the shoulder joint at an angle that will minimize the tension in the body. Different people will have different preferences, and it also depends on how high you wish to place the wrists in the back. It’s very likely you realize you are more flexible than you thought when you find the right position for you. This will require some practice and is easier with a partner to help guide the body in the different positions. If you are helping a partner, use only a gentle force; we are working with the body, not against it.
Compare these different approaches:
- Front position: roll the shoulder to the front, pull the arm down, maintain the pull as you bring up the wrists behind the back, bend the elbow and rotate the forearm as you bring them backward. This position is often preferred when we want to bring the hand higher in the back.
- Back position: roll the shoulder to the back, pull the arm down and bring the wrist to the back while keeping the tension toward the back. This position is often preferred by people who enjoy opening their shoulders.
- Neutral position: don’t do anything special; let the body naturally set itself into place. For many people, this will be preferable to forcing the shoulder in any position.
If any position doesn’t feel right for you, you don’t have to endure something that feels off for your body. As you continue exploring with mobility, you can revisit these positions from time to time to see if they feel different.

Locking the Elbow Straight
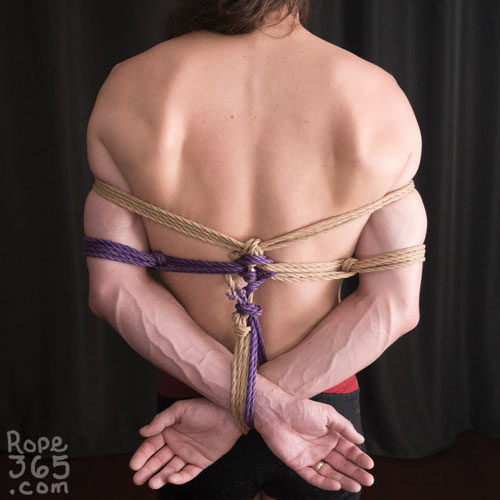
Preventing the elbows from moving is an important part of the feeling of restriction. Because they share the same bones, the elbow and the wrists are connected together. Overextending the pronation of the hand will force the elbow in a straight position. In martial arts they leverage the relationship between the two joints to create a chain reaction, by pulling the thumb in the right direction, the wrist will rotate, the elbow will straighten up and the rest of the body will follow in compliance.
Explore bringing the hands together with the palms facing out, either in front, in the back or over the head. Observe how the angle of the wrists creates a restriction at the elbow.
[Coming soon, pictures of the elbow straight with wrist control]
Spine and Lower Body Mobility
Controlling the movement of the spine will create a ripple effect to control the whole body. From there, the legs offer many options of movement and restriction. Each articulation has its own mobility particularities that vary from person to person. We continue our exploration from the upper limbs of Day 52 for a better understanding of full body restriction.
Understanding the Spine
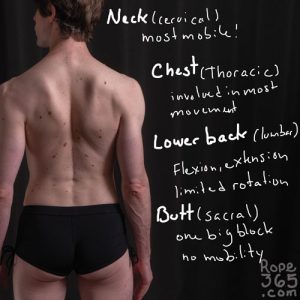
The back is a fascinating part of the body, it holds the whole body together while moving in several directions. Understanding how the different vertebrae work together and how the different parts of the body are attached to it enables us to move the back in a safe and interesting way.
Our spine evolved into a curved shape to better handle gravitational stress. We can look at the structure of the spine as two layers. The layer toward the inside of the body which is cylindrical with the intervertebral disks is the more structural part. This is where the body will handle compression, weight-bearing and other tensile forces. The bone part is static, and the disks will change their shape to absorb compression, bending and torsion. The exterior layer of the spine is the most mobile with the prolongation of the vertebrae as the static part and lots of different ligaments allowing for movement.
The spine can do four types of movements: flexion (forward bend), extension (backbend), rotation (torsion) and lateral flexion (to the side). The 24 bones of the spine can be divided into four sections with each having different mobility.
- Cervical (neck): The most mobile part of the spine.
- Thoracic (chest): Involved in every type of movement.
- Lumbar (lower back): This is where most of the action happens for flexion and extension beyond the cervical but is quite limited in rotation.
- Sacral (butt): This one is one big block with no mobility.
Coming soon, image with the different part of the spine
When we breathe in, we help remove some of the compression forces from the spine, which can help reach higher mobility. When the intervertebral disks expand, the bones are further from each other leaving more space for movement. You can quickly experience this by exhaling in a neutral position and then twisting your body in one direction, then try again with your lungs filled with air and see if you can twist a little further.
Average mobility of the spine (angle from a neutral position)
| Type of movement | Flexion | Extension | Axial Rotation | Lateral flexion |
| Cervical | 40° | 75° | 50° | 35° |
| Thoracic | 45° | 25° | 35° | 20° |
| Lumbar | 60° | 35° | 5° | 20° |
| Total | 145° | 135° | 90° | 75° |
Source: Yoga Anatomy by Leslie Kaminoff, Amy Matthews
Lower Body Joints Mechanics and Safety
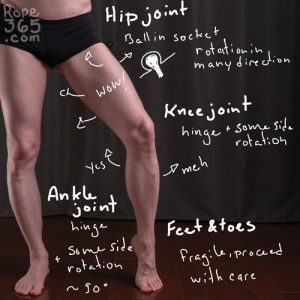
The legs can be placed and bound in many creative ways. Understanding how the different joints work helps visualize the many possibilities and explore in a safer way.
The hip bone is one of the most important pivot points of the body. It is connected with the sacrum part of the spine. Many muscles are attached to the hip bone, so when it moves, it affects the whole body. Several abdominal, back and shoulder muscles connect the upper body to the hip bone. We also have the glutes, hamstrings, lateral rotator group and some of the anterior compartments of the thighs that attach to the hip bone and connect the legs to the pelvis.
The main point of connection between the hips and the legs is with the femoral bone via the hip joint. It is the largest ball and socket joint of the body, which makes it quite sturdy. It also goes under tons of stress during our lifetime from repeated motion, so pre-existing injuries are quite common. Engaging the muscles in the abdomen and the hips when moving or pulling on the leg will help protect it during a rope session. This is especially important for hypermobile people that can be tempted into letting the leg be pulled away from the socket, which is bad for the joint in the long run.
The knee is a modified hinge joint between the femur, the tibia and the patella (kneecap). Its mobility is mostly flexion and extension but it can also rotate slightly internally and externally. The knee is the largest joint in the body, and it is also prone to injury as it absorbs a lot of the weight and shock from walking, running, jumping. Several tendons and ligaments hold together this structure of bone, cartilage and menisci. We should avoid adding lateral pressure on those tendons as it is vulnerable to shearing forces.
The ankle is actually a combination of three joints between the tibia, the fibula and the talus. It is the most commonly injured of the major joints, sprains and fractures are quite common. The ankle has limited mobility in dorsiflexion, plantarflexion and rotation, which create opportunities for restriction.
And finally the feet, a collection of 26 bones and 33 joints. Individually the joints don’t have a lot of range, but collectively they allow the feet to take many shapes. The feet and toes present many opportunities for tying, we’ll dive deeper into that topic in Week 25.
It’s an interesting contradiction that the lower body is built in such a sturdy way, but is so frequently injured. If these types of injuries aren’t very likely during bondage, it is common for participants to have pre-existing conditions that will affect mobility and have to be taken into consideration when tying. That said, if your bondage session has wrestling vibes, sprains and similar incidents are possible outcomes. Consult a medical professional for any lasting pain.
My favourite part of lower body mobility is that each part has its own mobility and is connected to each other in a way that we can create chain reactions. By understanding each part, we can exploit the natural movement and limitations to create an infinite amount of movement and restrictive positions.
Lower Body Restriction and Blood Circulation
The movement of the leg muscles is an important component of blood circulation. The feet being the furthest from the heart, the arteries and the vein need a little bit of help to keep the blood flowing back. This is especially important when standing up since gravity adds an additional force to the system.
We rarely notice this in our daily life as we are walking and moving, keeping the circulation going. Except maybe when we’ve been lying down without moving for an extended period of time and suddenly stand up, it is quite common to experience dizziness or nausea. These are symptoms of circulation slowing down, the blood accumulating toxins and then being pushed back suddenly into the body. It’s unpleasant but not dangerous on its own.
In bondage, we often play with restricting movements in the leg for an extended period of time, which means the same phenomenon is likely to happen. Which can lead to nausea, fainting or panic attacks. This can be mitigated by regularly contracting the quadriceps during the tie, and resuming movement slowly whenever the leg didn’t move for an extended period of time. Tying on the floor is the safest, if you wish to tie standing up make sure there is always someone in catching distance, or have some physical anchoring in place. A great way to keep the calf muscle at work during a tie is to get the person on their tiptoes once in a while. Many fun tortuous ties can help you create this type of play, we’ll look at some of these in Week 25 and 46.
Backbending in Hogties
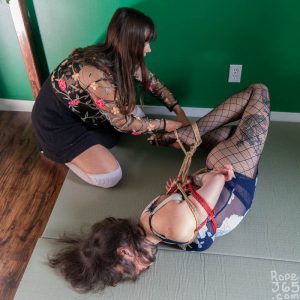
When the person being tied is lying facedown on the ground in a hogtie, there is a point where simply pulling on the rope connecting the ankle to the upper body will not restrict them further. The knees will be flexed at the maximum, but if the spine is stacked straight with the knee, we don’t engage the mobility of the spine.
Start by lifting the knee before pulling the ankle toward the chest and observe how the spine will follow the pulling motion, bringing the feet much closer to the chest. This is much easier when on the side, as you won’t have to fight gravity as much. Push the knee to the back to engage the spine.
If you want to focus the bend in the spine, you can limit the flexion mobility of the knee by tying tight wraps right above the knee joints.
Pulling the body into a deeper backbend will increase the intensity and the feeling of helplessness but also makes this tie less sustainable. Be prepared to untie quickly.
Creating Torsion in the Spine

Twisting the body is a fun way to create restriction, get the shoulder in one direction, and get the hips in the opposite direction. This is more difficult than it sounds. An important part is to get the spine straight as a starting position. This will give the maximum range of motion to twist the body into position. We’ll dive into more torsion positions on Day 166.
Exploring Hip mobility
Try different leg positions and observe the difference depending on the initial position and movement direction
- Bring the knees to the chest
- Extend the legs in front
- Leg open on the side, rotate the leg into position
- Sitting cross-legged
- Keep the knees together, bring the knees to the chest, cross the calf and open
- Bring one leg in position first, add the second one after
- Ankles on one side
- Start sitting with the legs in front and bring them to the back
- Start kneeling and just moving the butt on side
- Pigeon pose – one leg in the front, one in the back with knees bent
- Explore the position of the front leg, more tucked toward the body, or more open with hip opening
- Explore the position of the leg in the back. Try having the calf more perpendicular to the back leg.
Coming soon, pictures of different leg position in rope
Practice Time!
Try different arm positions and explore how you can adapt them to be more restrictive or sustainable depending on the mobility and preferences of the person being tied.
Explore the difference in range of motion depending on how you move into position. Once you have found your favourite position, try to tie that position while keeping the angles of the joints in place. Each person is different when it comes to flexibility, observe which part of the spine and lower body has more mobility with different yoga poses.
Exploration ideas:
- Measure your mobility before and after warming up, do you see or feel an improvement?
- Compare pointing the elbow up with an abduction vs rotation of the shoulder.
- Which box tie position feels the best, shoulder rolling forward, backward, or neutral?
- How far can the elbow go in the back? Is it different if the palms are facing inside or outside?
- Explore with different positions of the arm, rotate the hand in pronation and see what happens.
- Measure the range of motion of your spine for flexion, extension, rotation and lateral flexion. Compare the range if you breathe in.
- Explore bending the back in different positions, lying on the belly, side or kneeling.
- Compare twisting the body with a straight spine vs bending forward
- Compare different ways to get into the same leg position. Which method felt the most natural to you?
- Try asymmetric poses, does one side feel better than the other?
- Does it feel better to move one side before the other? Move them at the same time?
Inspirations and Resources
- Warming Up for Shibari by Shibari Study
- PNF Stretching: A How-To Guide by Peggy Pletcher
- Best Stretches for Arthritis Morning Stiffness by Ellen Greenlaw
- Pregnancy and BDSM by Stephanos and Shay
- Photo by Ren Yagami
- Warming Up for Shibari by Shibari Study
- The motion of the hip joint by Massimo
- Kurmasana adjustment by dallasiyengaryoga
- Video by bipinyoga (riffle tie position)
- Battement jeté passé développé video by simpledancerslife
- Travailler ses muscles et sa souplesse ! (demonstration of hip mobility, french)
- Pregnancy and BDSM by Stephanos and Shay
Or return to Anatomy for more options
Credit:
Leave a Reply