Beautiful shapes emerge out of imbalance. Pulling the wrists in different directions will pose the arms in an infinite number of combinations. It is interesting to observe how each side can be different as well. Our bodies aren’t completely symmetric. Differences can be big or small, and it becomes really important to have asymmetric ties in our toolbox to adapt when injuries happen.
The goal of this week is to explore different approaches to asymmetry and how imbalance influences the feeling of a tie.
Day 113: Front Asymmetry – Tie the wrists together and try pulling them in different directions, try the hip, the chest, or going over the shoulder. Pull the wrists in different directions in front, around the chest, over the elbow, around the hips. Explore the various positions you can create. Once you find a position that feels good, create a tie to keep it in place.
Day 116: One-Arm Box Tie – Modify your favourite box tie to include only one arm. You can keep the wraps over both arms or keep one arm free. Explore different options with the other arm, front, side, or just leaving it loose.
Day 117: Solo Chicken Wing Tie – Create a chicken wing on one arm and explore different ways to attach it to the body. You can try to put the elbow pointing up, down, to the front or backward. This allows to create one-arm version of various ties like the Bunny (Wakizarashi) , Demon (Tengu) or Angel (Tenshi).
Day 118: Riffle Tie – Aka teppo shibari 鉄砲縛り(riffle tie). The most classic of the asymmetric tie, one elbow pointing up, the other arm in a box position or with the elbow pointing down. This position can become difficult to hold as the upper arm is fighting gravity, make sure you can untie quickly as this position can be quite challenging. The variation with the top arm around the neck instead is called Choking Riffle Tie or self-choking teppo.
Day 119: Broken Strappado – Tie the wrists together in the back, if flexibility allows, tie the forearms together as well. Then break the symmetry by pulling them on one side.
We compiled a Youtube playlist with various videos on this topic, let us know if you find others we should add to this list. Note that video references may display risky or unstable techniques, viewer discernment is advised.
Gallery
Wrists to the side
Tied the wrist together and pulled the wrists to the side. Inspired by A-Nicolas. M: FreakyFerret R/P: EbiMcKnotty
Wrists to the shoulder
Front - Tied the wrists together and pulled to the shoulder. Used left-over rope to open the elbows. Inspired by A-Nicolas. M: Hanna R/P: Ebi McKnotty
Wrists to the Shoulder
Back - Tied the wrists together and pulled to the elbows. Used left-over rope to open the elbows. Inspired by A-Nicolas. M: Hanna R/P: Ebi McKnotty
Wrists to the Side
Front - Wrists together and tied to the side of the waist. M: Hanna R/P: Ebi McKnotty
Wrists to the Side
Back - Wrists together and tied to the side of the waist. M: Hanna R/P: Ebi McKnotty
Wrists to the Side
Front - Wrists pulled to the side, with the front open with a diamond tie. M: Hanna R/P: Ebi McKnotty
Wrists to the Side
Back - Wrists pulled to the side, with the front open with a diamond tie. M: Hanna R/P: Ebi McKnotty
Wrists to the Side
Front - Wrists pulled to the side, used the leftover rope to support the forearms and pull the elbow in. M: Hanna R/P: Ebi McKnotty
Wrists to the Side
Back - Wrists pulled to the side, used the leftover rope to support the forearms and pull the elbow in. M: Hanna R/P: Ebi McKnotty
Wrists to the Side of Waist
Front - Wrists pulled downward to the side of the Waist. Used leftover rope to bind the upper arms to the chest. M: Hanna R/P: Ebi McKnotty
Wrists to the Side of Waist
Back - Wrists pulled downward to the side of the Waist. Used leftover rope to bind the upper arms to the chest. M: Hanna R/P: Ebi McKnotty
Wrists to the Back
Front - Pulled the wrists together backward. This position is less maintainable but interesting from a restrictive perspective. M: Hanna R/P: Ebi McKnotty
Wrists to the back
Back - Pulled the wrists together backward. This position is less maintainable but interesting from a restrictive perspective. M: Hanna R/P: Ebi McKnotty
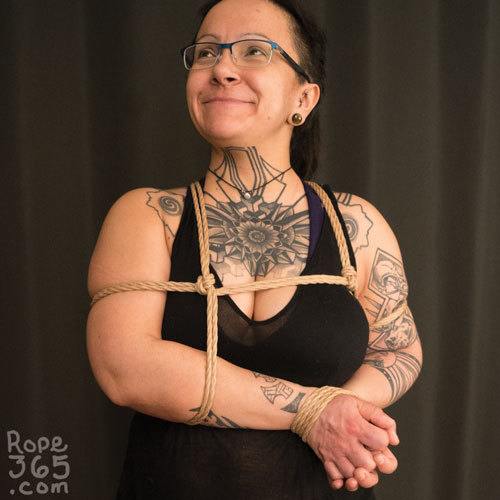
Asymmetrical Arms in Front
Pulled both wrists in different direction and tied them to the upper body. M: Freaky Ferret R/P: Ebi McKnotty
One in Front, One in the Back
Front - Tied both arms independently on each sides of the body. M: Hanna R/P: Ebi McKnotty
One in Front, one in the Back
Back - Tied both arms independently on each sides of the body. M: Hanna R/P: Ebi McKnotty
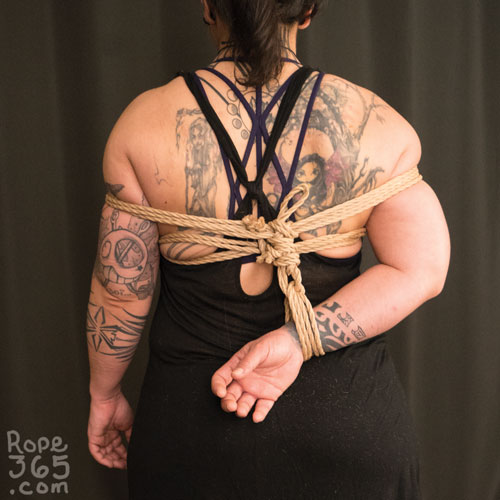
Asymmetric arms in the back
Pulled one wrist down and wrapped around the chest to capture the elbow and the other wrists. M: Hanna R/P: EbiMcKnotty
One in Front, one in the back
Tied one arm in front and the other in the back and explored how to bind them to the body. M: Freaky Ferret R/P: Ebi McKnotty
One-arm Box Tie
Used the classic pattern of the one rope box tie but included only one wrist in the beginning. M: FreakyFerret R/P: Ebi MckKnotty
One-Arm Box Tie
Front - Classic Box Tie pattern with wraps on the chest on one side. Tied the other arm to the front of the structure. M: Hanna R/P: Ebi McKnotty
One-Arm Box Tie
Back - Classic Box Tie pattern with wraps on the chest on one side. Tied the other arm to the front of the structure. M: Hanna R/P: Ebi McKnotty
One-arm Demon Tie
A one arm variation the of the demon tie (tengu). M: Hanna R/P: Ebi McKnotty
Chicken wing to waist
Using leftover rope from the chicken wing tie to tie it to the chest. M: Nathaniel Flumen R/P: EbiMcKnotty
Chicken wing to head
Using leftover rope from the chicken wing tie to bind it to the head. M: Nathaniel Flumen R/P: Ebi McKnotty
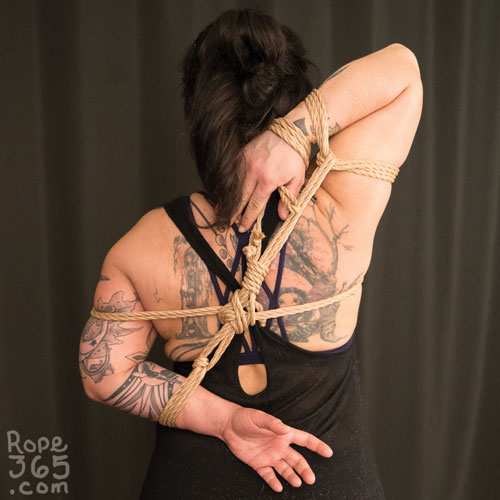
Riffle Tie
Wrists to wrists in the back and bind the arms with one elbow pointing up, and the other downward. M: Freaky Ferret R/P: Ebi McKnotty
Riffle Tie
Improvised tie with the lower wrist tied high in the back. M: Hanna R/P: Ebi McKnotty
Riffle Tie
One arm with the elbow pointing up and the other in an horizontal position. M: Hanna R/P: Ebi McKnotty
Self-Choking Riffle Tie
Wrist to wrist in the back, one elbow down, the other arm wrapped around the neck for a chocking effet. M: Freaky Ferret R/P: Ebi McKnotty
Self-Choking Riffle Tie
Front - One arm around the neck with the wrist attached to the other wrist in the back. M: Hanna R/P: Ebi McKnotty
Self-Choking Riffle Tie
Back - One arm around the neck with the wrist attached to the other wrist in the back. M: Hanna R/P: Ebi McKnotty
Broken Strappado
Bond the wrist and the elbows together in the back and pulled the wrist to the side for an asymmetric position. M: FreakyFerret R/P: Ebi McKnotty
Broken Strappado
Tied the forearms together and pulled to the side. M: Hanna R/P: Ebi McKnotty
Inspirations and Resources
Got more resource suggestions? Write it in the comments!

 Day 114: Back Asymmetry – Try different ways of positioning the arms in the back. Pull up, down, or to the side to see what happens.
 Day 115: One in Front, One in the Back – Create a tie to bind an arm in front and the other in the back.
 Day 116: One-Arm Box Tie – Modify your favourite box tie to include only one arm. You can keep the wraps over both arms or keep one arm free. Explore different options with the other arm, front, side, or just leaving it loose.
 Day 117: Solo Chicken Wing Tie – Create a chicken wing on one arm and explore different ways to attach it to the body. You can try to put the elbow pointing up, down, to the front or backward. This allows to create one-arm version of various ties like the Bunny (Wakizarashi) , Demon (Tengu) or Angel (Tenshi).
 Day 118: Riffle Tie – Aka teppo shibari 鉄砲縛り(riffle tie). The most classic of the asymmetric tie, one elbow pointing up, the other arm in a box position or with the elbow pointing down. This position can become difficult to hold as the upper arm is fighting gravity, make sure you can untie quickly as this position can be quite challenging. The variation with the top arm around the neck instead is called Choking Riffle Tie or self-choking teppo.
 Day 119: Broken Strappado – Tie the wrists together in the back, if flexibility allows, tie the forearms together as well. Then break the symmetry by pulling them on one side.


Leave a Reply