Day 11: Reverse Crossing Hitch
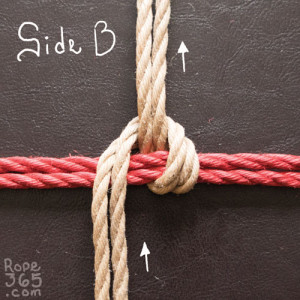
The reverse crossing hitch (also called reverse Munter hitch) has the same topology as the crossing hitch but is tied in the opposite direction. It’s nice to know both when you want to create symmetry, but they also function differently. The reverse crossing hitch will hold tension once tied; it is not as solid as other locking hitches but also remains easy to untie.
Reverse Crossing Hitch
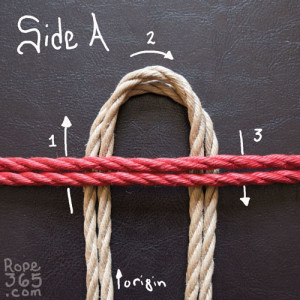
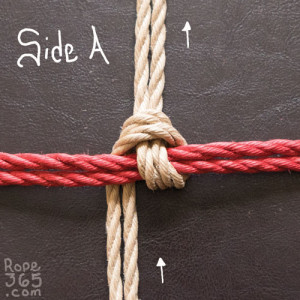
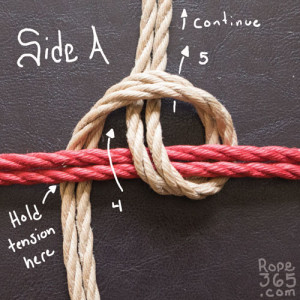
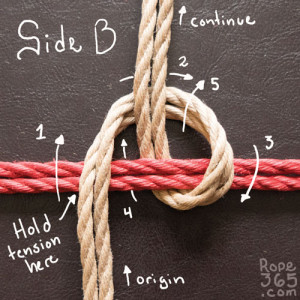
Tying the reverse crossing hitch is more tricky to execute than the regular version because we need to pull the rope in a narrow rope loop. It will require practice but can become a very efficient hitch as it requires only a single rope pulls.
Just like the regular crossing hitch, the reverse crossing hitch is directional and will behave differently if we tie it left, right, face up or down. A common trick is to do a twist with the loop before pulling the rope through. This will add friction and negate some of the directionality to make the hitch more solid.
The biggest challenge is to keep the tension when closing the hitch. Hold the base of the loop while pulling and tighten it in a single movement to prevent slippage. You can also anticipate some tension will be lost and offset it a little bit, moving the hitch afterward to bring the tension back in.
Rope Cage
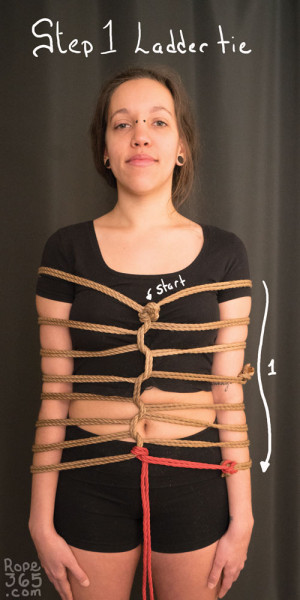
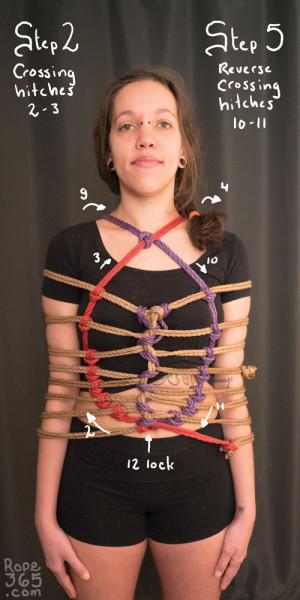
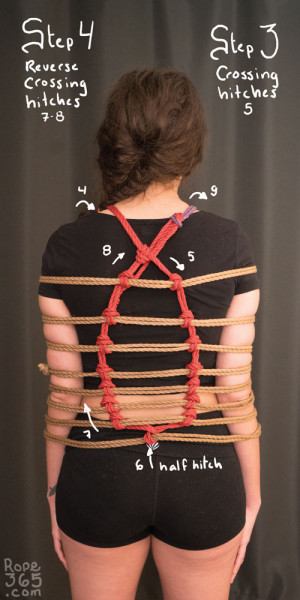
Adding crossing hitches to a ladder will make it progressively stronger. To create a strong structure, we need to combine the crossing hitch and the reverse crossing hitch to tie in every direction. Reverse crossing hitch will give better results when tying upward and will allow you to keep the symmetry with the regular crossing hitch.
If you feel like your crossing hitch is rolling out, try a reverse crossing hitch. The difference in tension direction might make it better to use a reverse than a regular crossing hitch in some cases.
Safety tip: if you tie standing, make sure the person tied up can hold, or leans on something to avoid falling, especially if the legs are tied.
Practice Time!
Let’s drill crossing hitches and reverse crossing hitch with a rope cage.
Self-evaluation checklist:
- The knots and frictions are compact and solid.
- The hitches are closed and stay in position. If you see your
- crossing hitch roll out, try to tie it in the reverse direction.
- Tension is equal in all the cage lines.
Exploration ideas:
- Try making a cage on different parts of the body: leg, torso, whole body, you decide!
- Experiment drawing different shapes when making the crossing hitches.
- Try changing the number of wraps and the distance between them.
- Try different techniques to make the baseline of the cage (spirals, reverse tensions, half-hitches etc.)
- Design other rope patterns that combine different types of hitches to maintain symmetry.
|
Being Tied: Exploring Balance #2 – sansblague As noted above, the ladder tie might be challenging to your balance if your legs are pushed together in standing. While being able to hold onto something is crucial for safety in this case, you can also take the occasion to practice balance by not clutching on completely to whatever you are holding. The first tip for keeping balance would be to focus your gaze on something in front of you, and keep your neck straight and relaxed. The second tip is to work actively with your core muscles. You can learn more about core control in almost any gym, yoga studio or dance class, but one way of self-checking that your core muscles are ready to keep you up is to pull in your navel a bit and to make sure your pelvis is comfortably resting under your chest, not being pushed forward or back. As you pull in your navel, remember to breathe. As mentioned in Exploring Balance #1, losing equilibrium might be exactly what you are after when you are being tied. But in order to let go in that way, you need at least one of these three things:
Unless you are sure that you have any of these, it is important that you know how to find your balance. |
Inspirations and Resources
Coming soon!
Credit: M: _Era_ R/P: Ebi McKnotty
Or return to Hitches for more options.

Leave a Reply