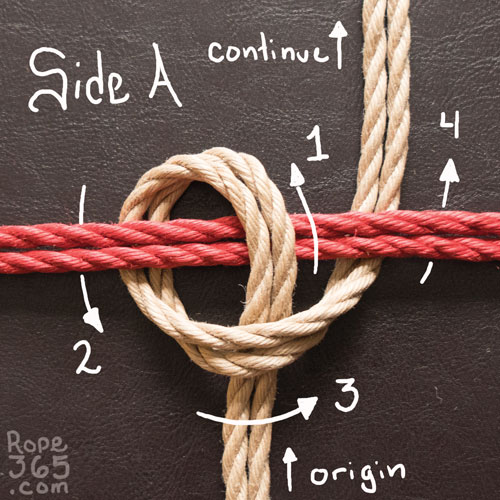
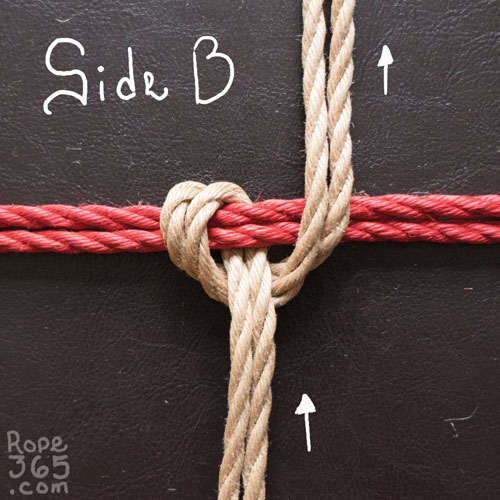
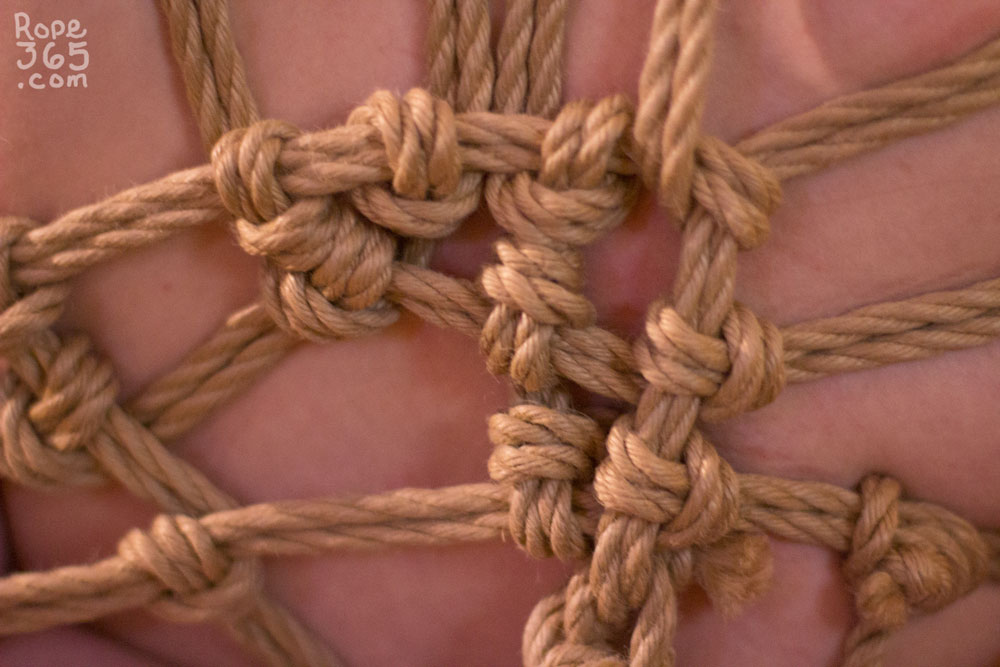
The crossing hitch, or nodome の止め in Japanese, is great to create a structure when two lines cross. This friction is often called a Munter hitch even if the crossing hitch is a little different from the knot popularized by Mr. Munter. The Munter hitch is used in climbing to add friction for controlling rate of descent in a belay system while the crossing hitch has a different purpose, which is to hold things in place at a crossing angle.
Crossing Hitch
The crossing hitch wraps around another rope or other object and then continues in the same direction. For maximum efficiency, folding the rope will create more contact points with the rope and create a more efficient friction.
The crossing hitch is asymmetric in two directions, it can be tied from the left or right, and the top and bottom. The difference between these will be minimal if the ropes cross at 90 degrees on a flat plane. But rope bondage works in three dimensions, as we aim slightly left or right, up or down, the forces inside the rope will make the rope shift in different ways.


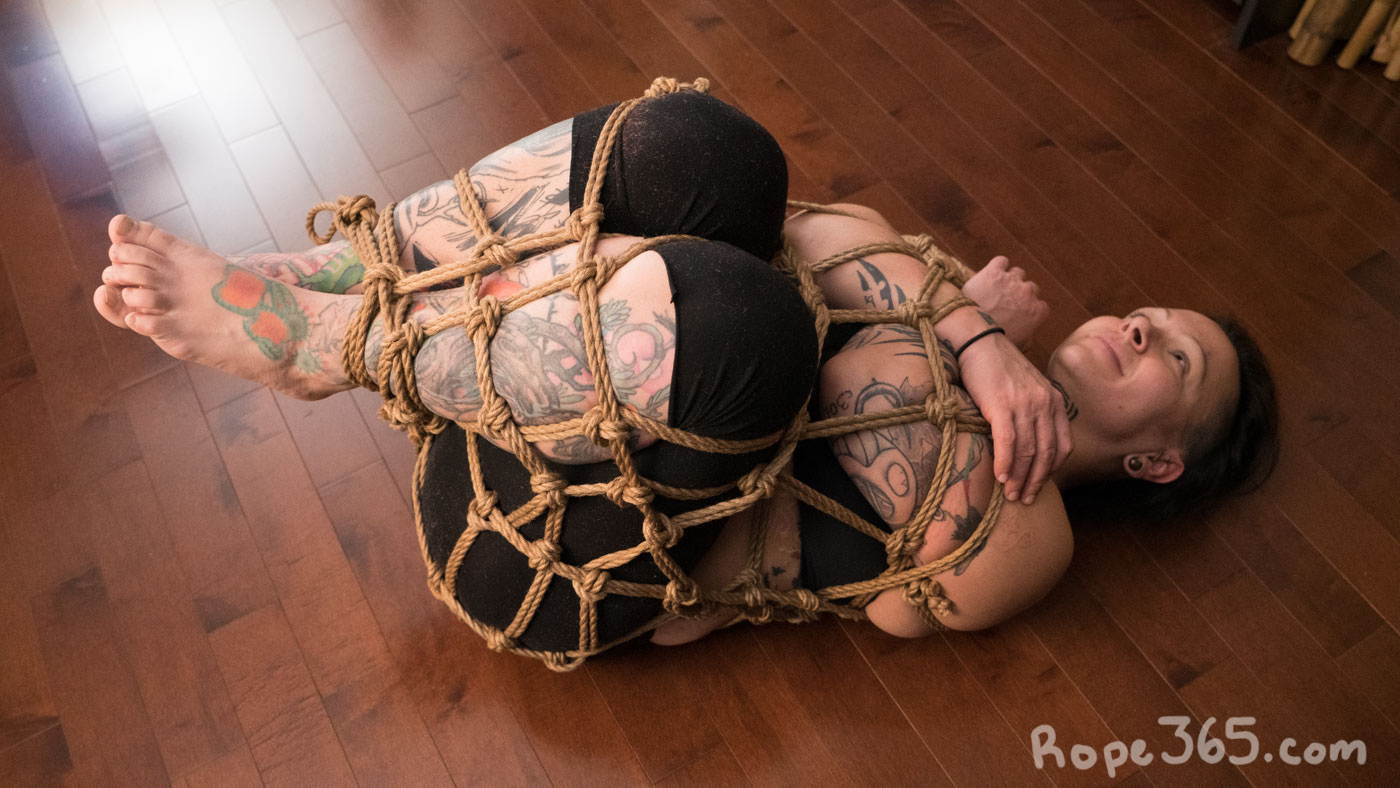
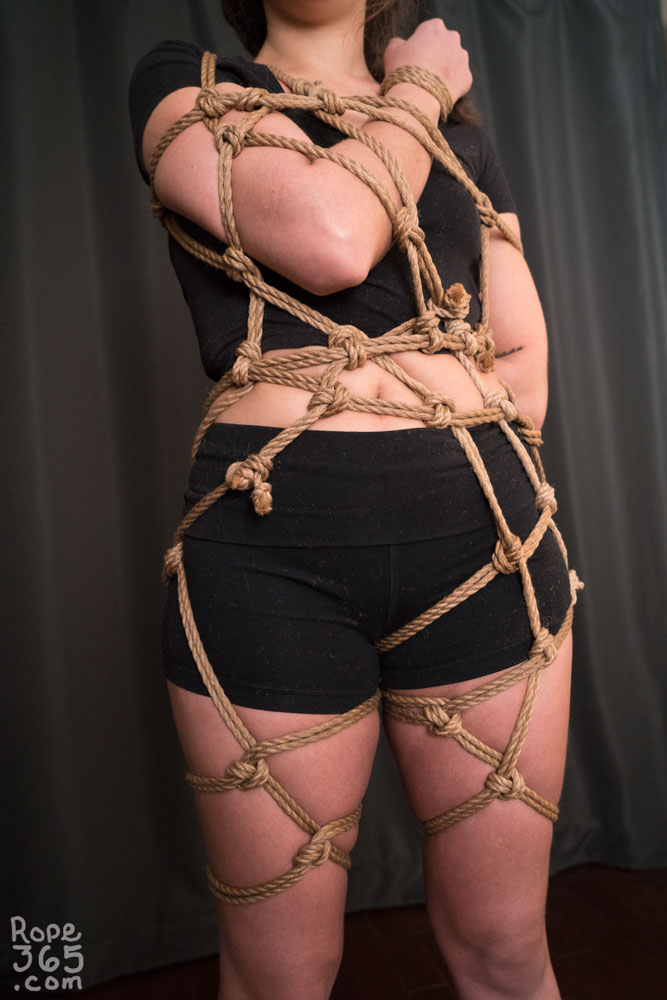
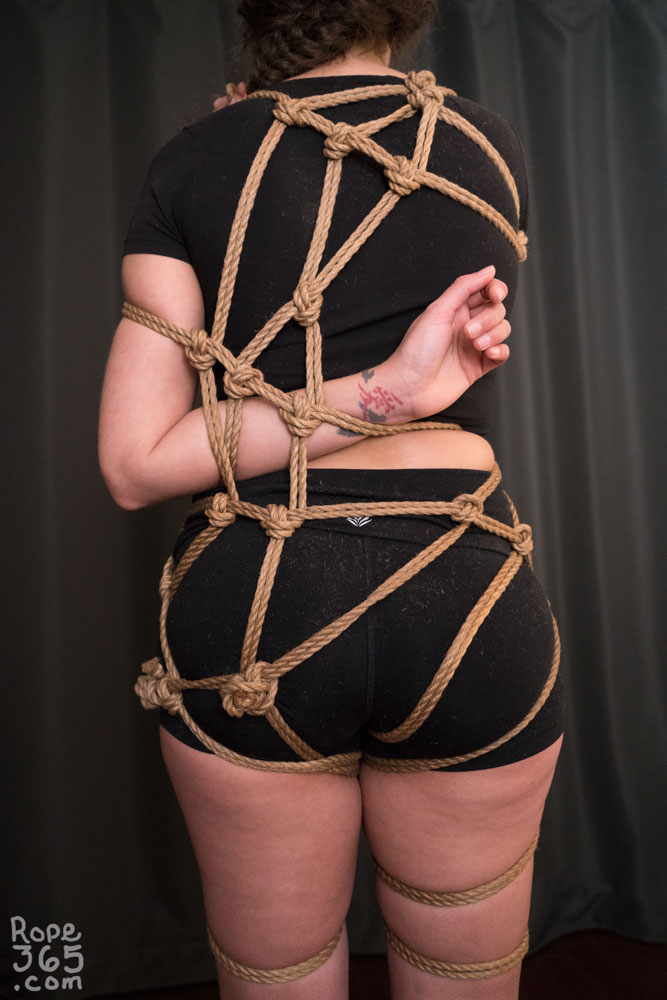
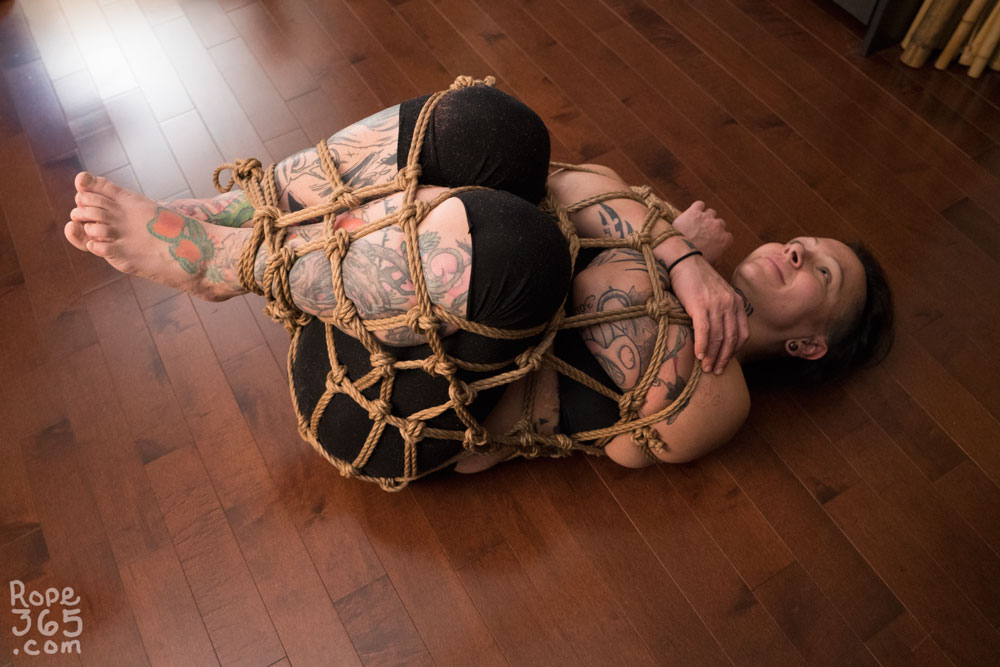
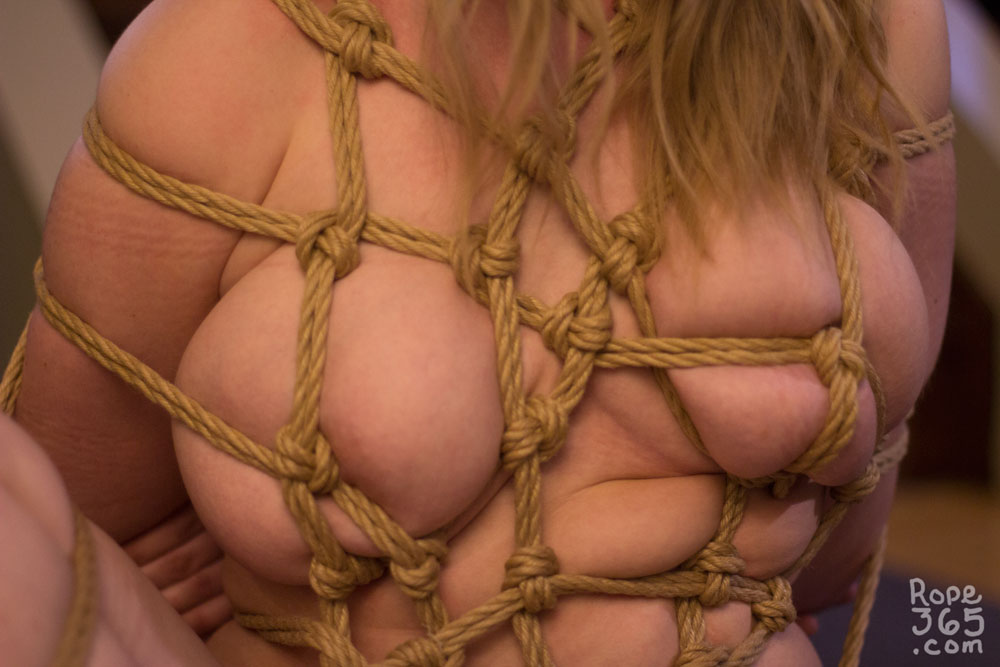
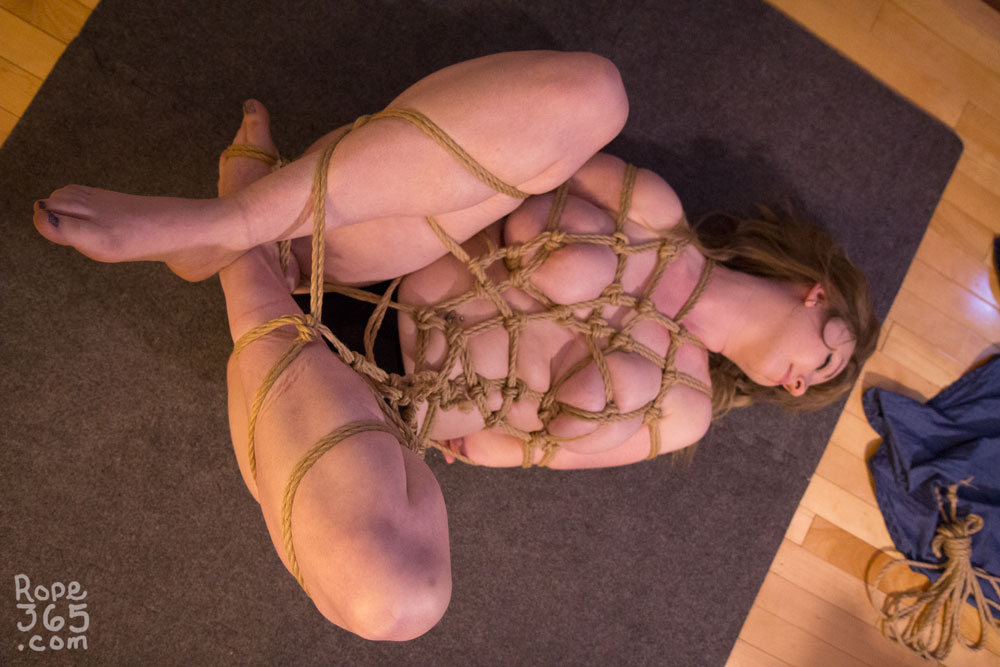
Rope Net Improvisation
Start with a single column tie and let the rope flow and follow these simple rules:
- When two rope cross, do a crossing hitch
- Keep adding rope for as long as you have fun (and feel safe)
- Recommended: take a step back and admire the beauty of your partner
Before improvising, discuss which parts of the body are good to be tied on and discuss how you will communicate the need to adapt during the tie. Avoid crossing rope over joints and adding pressure on nerves.

Practice Time!
Use crossing hitches to create a rope net on the body.
Self-evaluation checklist:
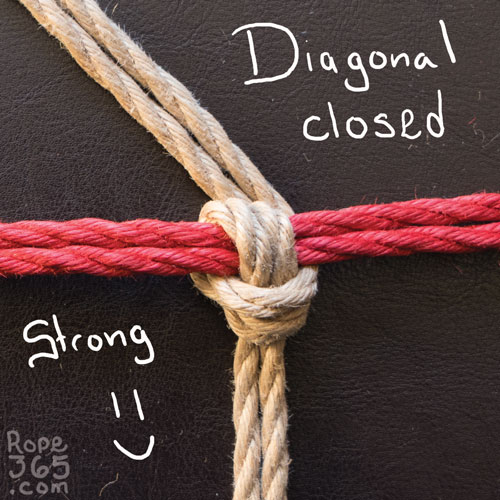
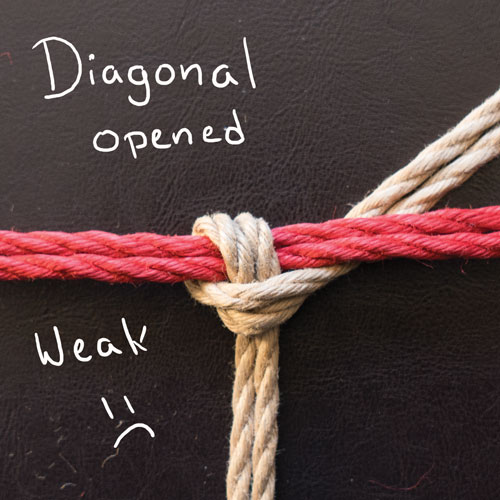
- The rope folds in a way that makes the crossing hitch compacted for maximum efficiency
- The crossing hitch is tied in the direction that it will stay closed.
- Maintain equal tension across the tie, note that catching a rope already under tension will progressively add tension depending on how much you pull. This is an opportunity to fix previous tension when it was too loose.
Exploration ideas:
- Try a different starting point: wrist, ankle, waist etc.
- Explore asymmetric arms positions.
- What is your favourite way to include the lower body?
- Take a step back, where else can another rope be added?
- Place the crossing hitches in locations that will make them fun to press like a button, such as nipples or other soft parts of the body.
|
Being Tied: Body Knowledge through Pressure – sansblague Once the adding of a new crossing hitch has ended, you can invite the one who tied you to push the existing crossing hitches into your body one by one. Say something about how each and every crossing hitch feels when pushed into your body before letting your partner move on to the next one. In some spots, it might be really nice to feel the push. In other spots, it might feel unhealthy, and you want the push to stop (then make it stop). In yet other spots, it might hurt really badly, but you still like it – somehow. Exploring each friction like this is a way for you both to get to know your body better. You also learn more about good placement for frictions while getting the opportunity to play a bit with pressure and touch. Good luck finding the sweet spots! |
Inspirations and Resources
Credit: Rope net idea by Pedro Cordas. Crossing hitch R/P: Ebi McKnotty. Rope Net 1 M: _Era_ R/P Ebi McKnotty Rope Net 2 M: FreakyFerret R/P: Ebi McKnotty Rope Net 3 M: Miss_Soffia R/P: AlexK7
Or return to Hitches for more options.