
Before we start to tie, the rope is waiting, neatly coiled, ready to be unleashed. We can store rope in many ways, each method will have pros and cons with different compromises. Different situations have different needs and adapting requires knowing a few techniques.
The goal of this week is to try different coiling methods, compare them, and combine them to find our own system.
Note – this page is a sample of the rope365 content. Subscribe to the mailing list to get notified when the full content gets published.
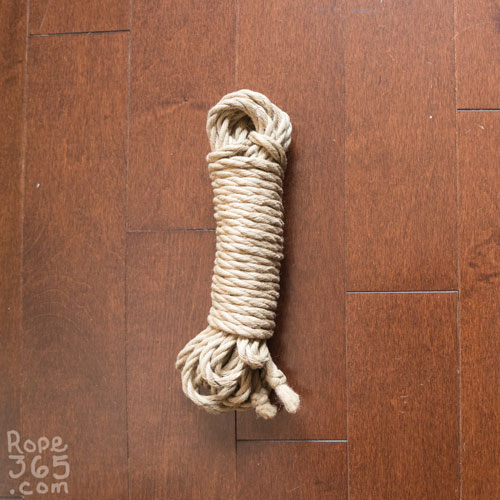
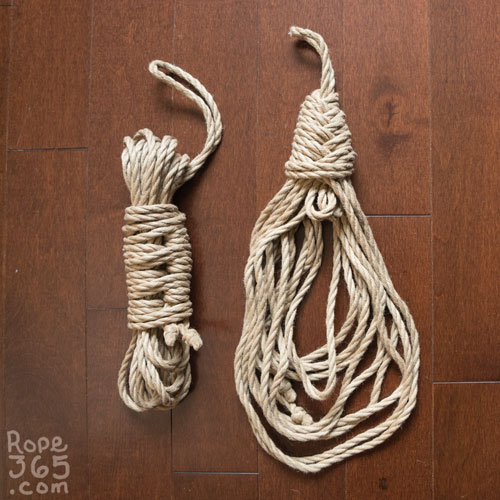
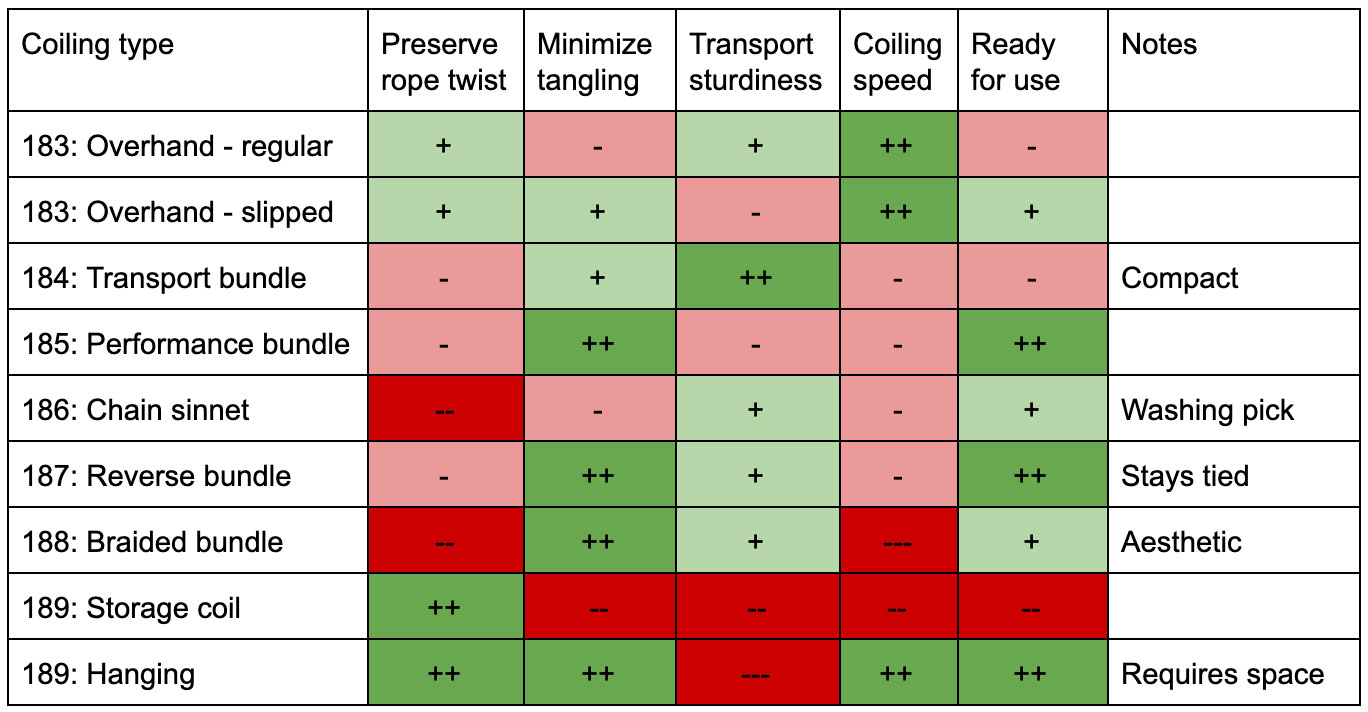
 Day 183: More Overhand Hanks – The overhand hank from Day 7 is an easy method that can be used for multiple purposes. It has multiple interesting characteristics: Day 183: More Overhand Hanks – The overhand hank from Day 7 is an easy method that can be used for multiple purposes. It has multiple interesting characteristics:
It also has some drawbacks:
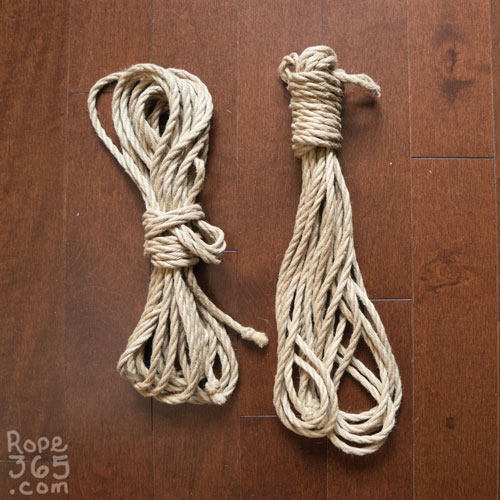
Create variations of the overhead hank to improve its characteristics. Try to replace the overhand knot with a slip knot and observe the changes:
Inspirations and Resources |
 Day 184: Transport Bundle – Create a compact study bundle by combining the bar wrap technique and a sturdy lock-off such as a quick turn or a bight tab. When we want to travel or mail-in rope, we want a bundle that will: Day 184: Transport Bundle – Create a compact study bundle by combining the bar wrap technique and a sturdy lock-off such as a quick turn or a bight tab. When we want to travel or mail-in rope, we want a bundle that will:
Some downsides we usually accept in that context:
Inspirations and Resources |
 Day 185: Performance Bundle – Combine techniques such as the figure 8 coil and quick release lock (half bight tab or half quick turn) to create a bundle perfect for performances. For ties that will require speed and precision, we want a rope bundle that will: Untie quickly. Never tangle. Visible bight to be used right away. Some downsides we usually accept in that context: The rope may winkle if stored for a long time. The rope may get undone in transport. Lower coiling. Day 185: Performance Bundle – Combine techniques such as the figure 8 coil and quick release lock (half bight tab or half quick turn) to create a bundle perfect for performances. For ties that will require speed and precision, we want a rope bundle that will: Untie quickly. Never tangle. Visible bight to be used right away. Some downsides we usually accept in that context: The rope may winkle if stored for a long time. The rope may get undone in transport. Lower coiling.
Inspirations and Resources |
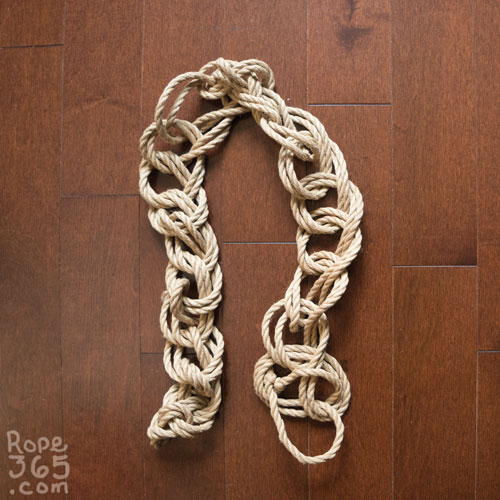 Day 186: Chain Sinnet – aka daisy chain – The chain sinnet is very popular among people who use braided nylon as it is easier to make with a slippery rope. It has multiple interesting characteristics: Day 186: Chain Sinnet – aka daisy chain – The chain sinnet is very popular among people who use braided nylon as it is easier to make with a slippery rope. It has multiple interesting characteristics:
It also has some drawbacks:
Inspirations and Resources |
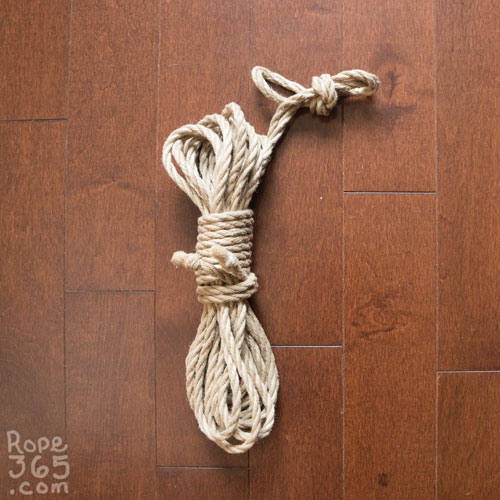 Day 187: Reverse Bundle – Create a bundle that will slowly uncoil as we use the rope by combing a tail tab to hold the end of the rope and a slip knot to mark the bight. You may improve your tying speed in some context by having the tail of the rope neatly bundled up until you have used most of the rope. This method is very practical when you don’t want your rope to touch the ground while tying. Day 187: Reverse Bundle – Create a bundle that will slowly uncoil as we use the rope by combing a tail tab to hold the end of the rope and a slip knot to mark the bight. You may improve your tying speed in some context by having the tail of the rope neatly bundled up until you have used most of the rope. This method is very practical when you don’t want your rope to touch the ground while tying.
|
 Day 188: Braided Bundle – Japanese warriors used to carry their rope around in a way that was both aesthetic and practical. Their beautiful bundles were braided in a way that allowed for a fast untying in case of emergency. Try the ebi musubi 海老結び (shrimp knot) and the kainokuchi 貝の口 (clam’s mouth), then compare their aesthetic and practicality. Day 188: Braided Bundle – Japanese warriors used to carry their rope around in a way that was both aesthetic and practical. Their beautiful bundles were braided in a way that allowed for a fast untying in case of emergency. Try the ebi musubi 海老結び (shrimp knot) and the kainokuchi 貝の口 (clam’s mouth), then compare their aesthetic and practicality.
Inspirations and Resources
|
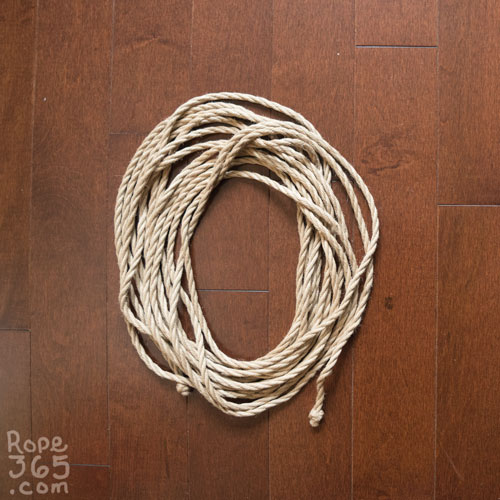 Day 189: Long Term Storage – If you are going to store the rope for an extended period of time, you will want to use a technique that will limit any tension on the rope twist and avoid pressure on the rope. If you have space, try hanging your rope on a horizontal pole, folded at the bight. This allows quick access to the rope while minimizing the impact on the rope structure. For a more compact option, coil the rope in a circle with even tension in the twist. You can use twine or tie wraps to fix the coil in place. If you are using natural ropes, make sure it has good aeration to prevent drying and moulding and oil it before storage. Day 189: Long Term Storage – If you are going to store the rope for an extended period of time, you will want to use a technique that will limit any tension on the rope twist and avoid pressure on the rope. If you have space, try hanging your rope on a horizontal pole, folded at the bight. This allows quick access to the rope while minimizing the impact on the rope structure. For a more compact option, coil the rope in a circle with even tension in the twist. You can use twine or tie wraps to fix the coil in place. If you are using natural ropes, make sure it has good aeration to prevent drying and moulding and oil it before storage.
|
Overview
Video References
We compiled a Youtube playlist with various videos on this topic, let us know if you find others we should add to this list. Note that video references may display risky or unstable techniques, viewer discernment is advised.
Gallery


More Inspirations and Resources
- Shibari Rope Storage – 5 ways to bundle your rope – Long term storage and more! by Haven Kink
- Coiling Rope by Kinetik Speicher
- How To Bundle Rope by Bondage Tuition
- A few ways to wank your rope by Zylah
- Rope storage options by Zylah
- Hanking and Storing Rope (2017 edition) by Zylah
- Basic rope handling skills with Twisted Monk
Or return to Fall for more options.
Credit: R/P: Ebi McKnotty