The two rope structure is often followed by a third rope and sometimes more. Adding more ropes can make the tie more restrictive, solidify the structure, add aesthetic elements or simply add more play to it. Different rope schools will have their own patterns with different approaches.
Front Stem and Shoulder Straps
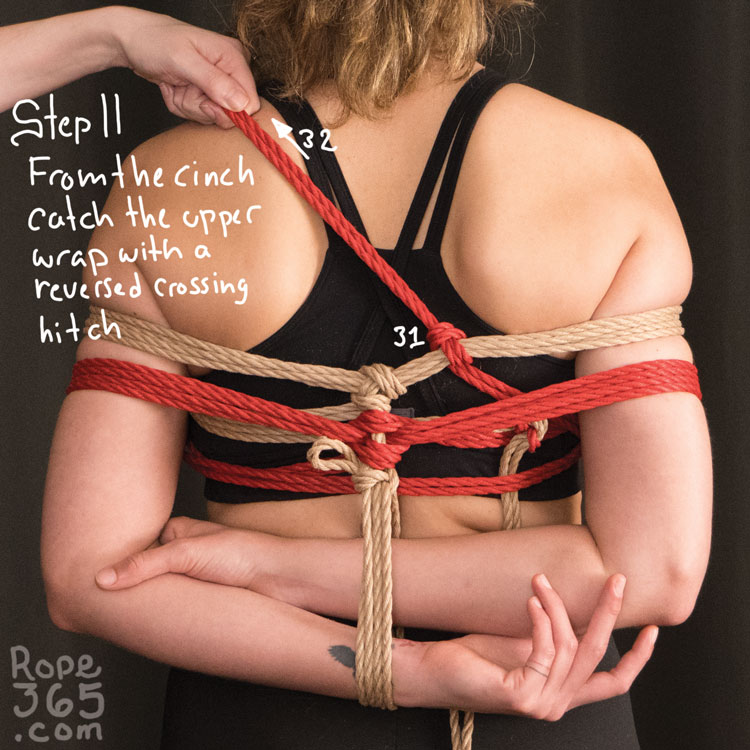
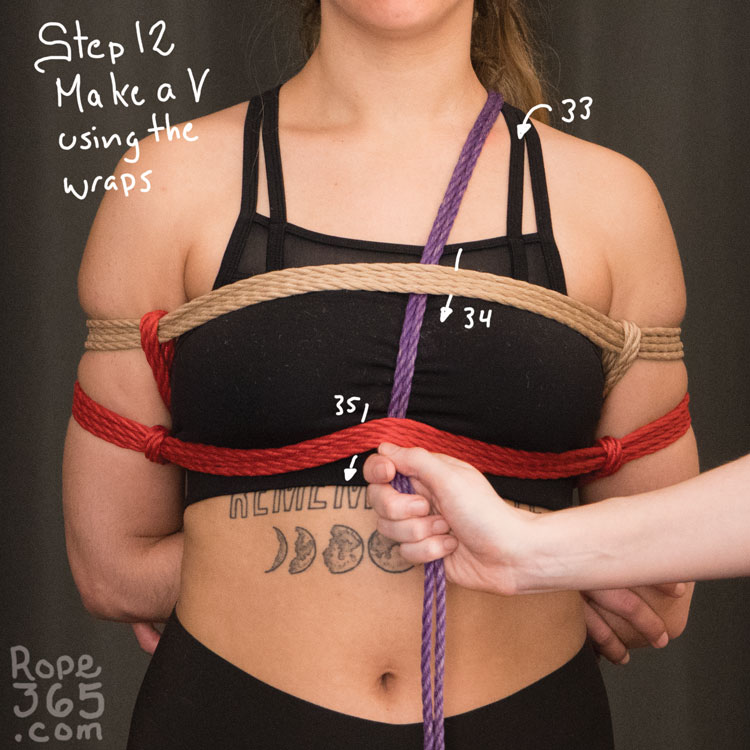
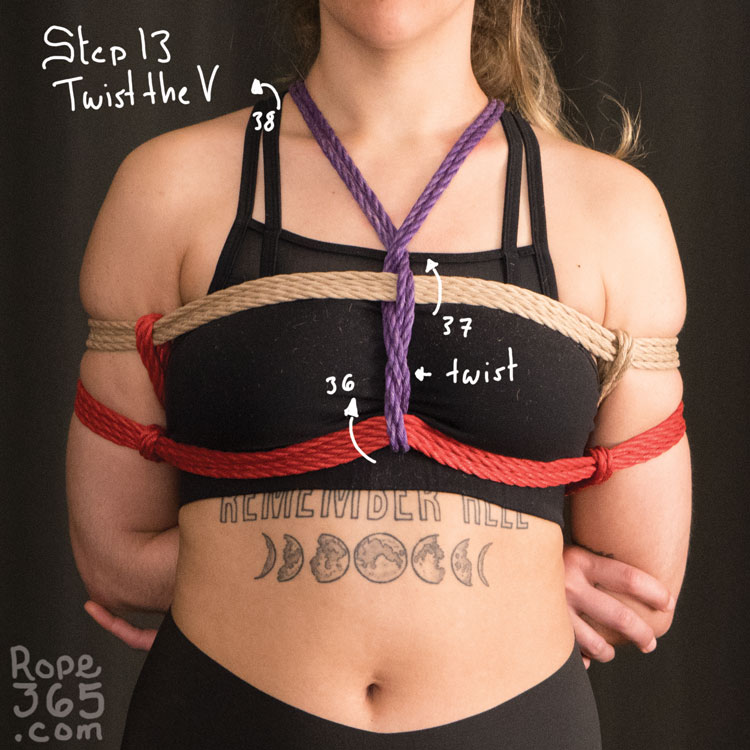
One of the most common ways to shape the front of the box tie is by going over the shoulder and catching the wraps in front to create a stem in the front. This add the possibility to attach to the front without worrying about sliding to the side. It is also a great way to add tension and shape the breasts or pectoral region.
Safety for All
Just like with the two ropes designs, we have to be mindful of the risk as we add more ropes. More rope mean more time to tie and untie. The rope passage over the clavicle may cause some discomfort, we can adjust tension, or use another rope to pull it away in a more comfortable spot.
Nerve issues with the third rope can happen with a very high level of tension on the top of the shoulders. Problems to the supraclavicular nerve can cause a numb patch on the clavicle region and the axillary be injured, causing weakness to raise the arm. These are easy to avoid by keeping the rope of the shoulder loose. If you wish to explore a higher level of tension, you can mitigate by doubling the ropes to spread the load on a wider surface. This kind of injury are more likely in suspension (especially dive positions) but can happen in floorwork if the rope is ultra tight. The length of the session and the cumulative aspect of nerve damage can also be contributing factors as these injuries are harder to monitor during the tie.
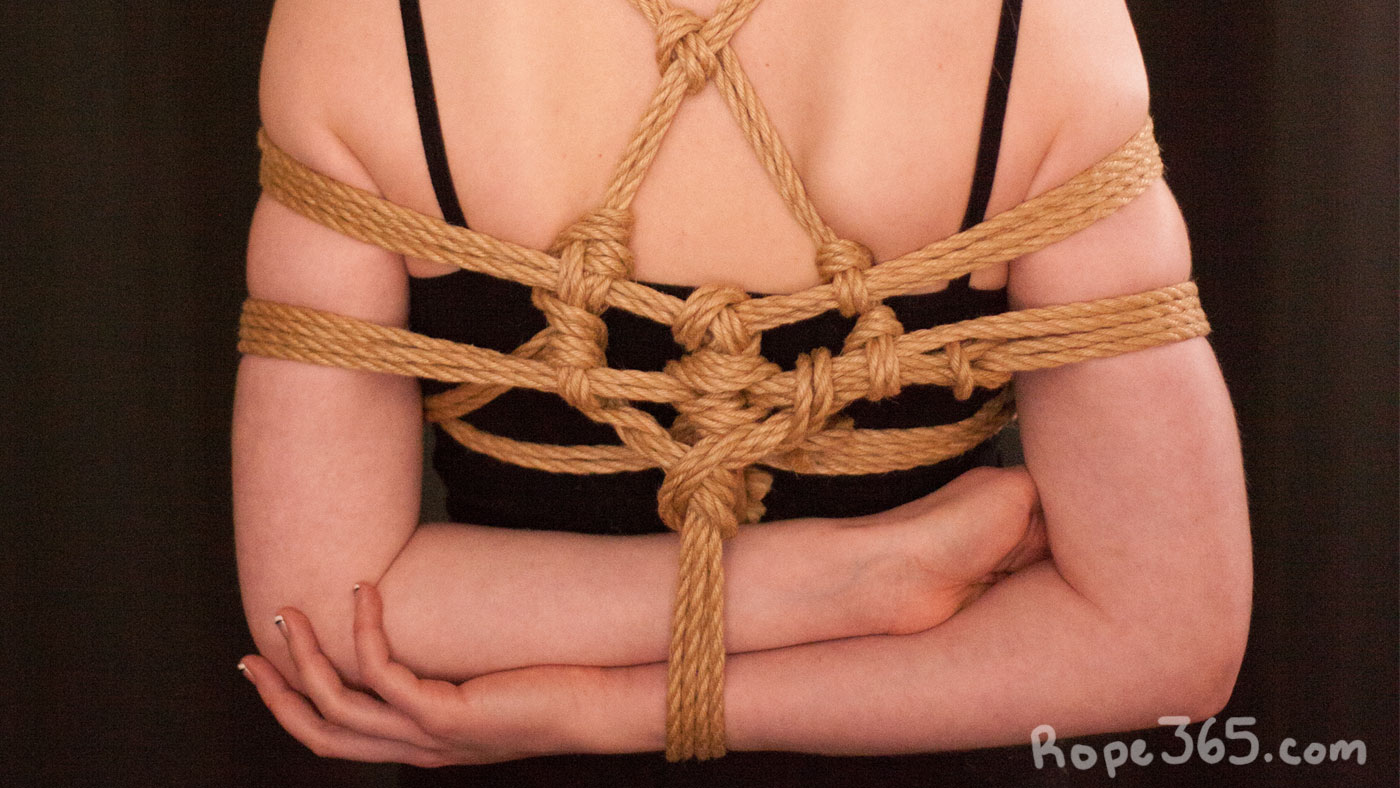
Stem in Front and Turtle Shell in the Back
The shape in the front is a similar technique to the ladder chest harness from Day 15. Here we combine it with a turtle shell pattern in the back that is both a structural addition that makes the whole tie more solid and an aesthetic way to finish the tie. The hexagon pattern is named kikkoo 亀甲 (turtle shell) in Japanese and was typical of the style of Akechi Denki 明智伝鬼 (1940-2005).
This pattern continues from the two rope box tie from Day 30, from the second cinch on the lower wrap.

For better results, make sure the tension in the hexagon in the back is very tight and links the wraps into a sturdy unit. In the front, you can adjust the tension on preference, some like to squeeze the breast and others prefer an open chest. The top of the shoulder will be the most sensitive part, run your fingers from front to back to help the tension feel more even on the skin.
Pattern variations
There are infinite patterns that can be used to continue a box tie. Most rope schools will have a few favourites that they pick depending on context.
- Different aesthetics to shape the chest.
- Making the structure more solid.
- Adding feelings of restriction.
- Adding play elements such as rope along the neck line, compression at the waist or tying the fingers in.
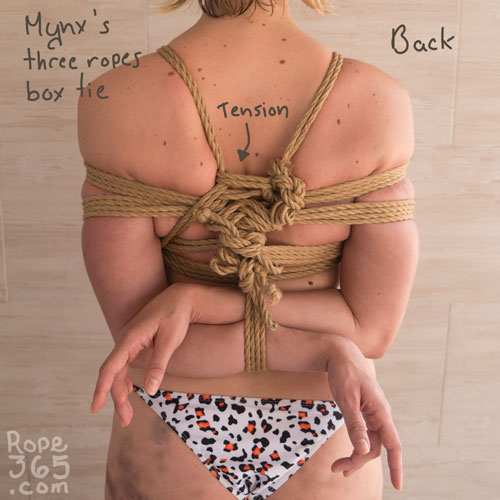
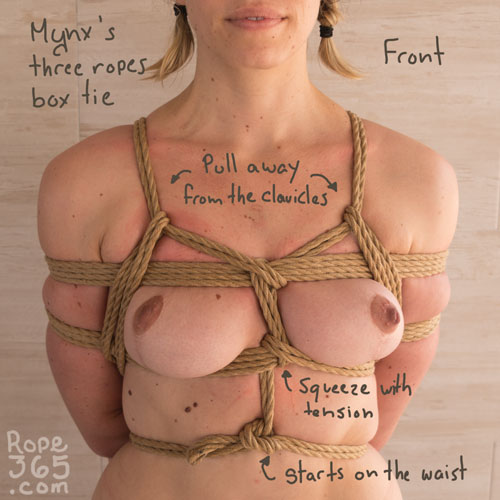
Mynx’s Three Rope Box Tie
It’s interesting to look at how a totally different style and construction flows and achieve similar goals of sculpting the shapes of the body and solidifying the structure. This variation start the third rope at the waist and explores a different way to add a front stem. The shoulder straps are pulled to the sides to prevent pressure around the neck and clavicles. Mynx’s interpretation of the box tie is influenced by her teacher Naka Akira 奈加あき, who is himself inspired by Nureki Chimuo 濡木痴夢男 (1930-2013).
More variations
There are few notable variations that are reflective of their style.
- The variation with two straps to the slide and creating a X shape in the front originate from Akechi Denki and is generally referred to as 襷掛け Tasuki Gake, Mount Fuji or mountain shape.
- An X shape close to the neck, sometimes followed by a diamond pattern was popularized by Akechi Kanna
- Different schools will use different knots and friction to attach to the front and create a sturdier structure.
Here is a gallery of different ideas to explore. We’ll dive deeper into different aspects of building structures in Week 18 with Upper Body Structures Variations.


Practice Time!
As we expand with different designs, the patterns can get less formal and we can explore our own creativity and create something special for the person we tie.
Self-evaluation checklist
- All frictions and hitches are compacted and strong
- Tension is even across the whole pattern (lower wrap should be looser)
- Is the pattern symmetric? In the front? In the back?
Exploration ideas
- Change the tension when pulling up on the wraps in front. Does it increase the squeeze on the chest?
- Use the remaining rope to pull the rope away from the clavicles
- Compare twist the rope between the breasts/pecs or leaving it open as a V on the upper or lower wrap
- Add frictions to solidify the structure
- Try pulling only half the ropes in the wrap
- Explore making different patterns in the back and test how they affect the stability of the structure
Solo tip
- How can you change the order of the tie to make it possible to tie this on yourself?
Inspirations and Resources
- Is the TK dangerous by WykD Dave
- TKs: An Extended Look by Sasori_D
- Three rope safety notes by Cannon
- TK – The Fast Third Rope by Bondage Tuition
- Videos by Yukinaga Max
- Videos by kamui jyubei
- ‘Classic’ 3 rope chest harness tutorial (aka 3TK). Part 2 of 2. By MrLuckiesRope
- The “Bones and Rope” face-up shibari suspension harness (3rd rope) by Anatomie Studio
- Videos by Esinem
- Videos by Haven Kink
- The Third Rope of a TK by Belle
- Videos by Nawakiri Shin & Kichiku Girls
- Chest Loading Takate Kote v4 by Topologist
- How to Tie the Takate Kote TK Kinbaku Bondage by Amanda Pasciucco
- Performance TK takate kote by Giotto
- Gote Shibari by TheDuchy
- Shibari Gote / Takatekote by Voudou Ropes
- Videos by Better Call It Art
- Videos by MiShibari
- How to tie a 3 rope takate kote boxtie by MasterFtt
- Takate Kote Variationen by MatthiasGrimme
- Photo by Ren Yagami 1 2 3 4 5 6 7 8 9 10 11 12 13
- Photo Wykd_Dave
- Photos by OsadaSteve 1 2 3 4 5 6
- Photos by Cannon 1 2 3
- Photo by SaaraRei
- Photo by Jolly_rigs
- Photo by Odys
- Photos by -Em- 1 2 3
- Photo by DWL
- Photo by Esinem
- Photo by Beemo
- Photo by MissLee
- Photo by FredHatt
- Photo by PortMstr
- See more box tie videos beyond this topic on the Rope365 Youtube playlist. Note that video references may display risky or unstable techniques, viewer discernment is advised. https://www.youtube.com/playlist?list=PLkrdRffh_Gg3jGVZNDK-RN5al99o3NY-e
Or return to Box Tie for more options.